The Ultimate Guide to Sewing Tools: Plus DIY Tool Bags, Rolls & Belts You Can Sew Yourself
- Home
- Style Tips
- The Ultimate Guide to Sewing Tools: Plus DIY Tool Bags, Rolls & Belts You Can Sew Yourself
The Ultimate Guide to Sewing Tools: Plus DIY Tool Bags, Rolls & Belts You Can Sew Yourself
Every great garment begins with precision, but even the most talented hands struggle without the right sewing tools. A dull pair of shears, a broken threader, or misplaced needles can turn what should be a relaxing creative process into hours of frustration. Whether you’re crafting a bridal hem, adjusting a tuxedo cuff, or stitching custom accessories, the wrong tools can make perfect results feel out of reach.
That’s where Precision Alterations bridges the gap between craftsmanship and confidence. Known for luxury tailoring and bridal fittings across Phoenix, Tucson, and nationwide, our team understands how the right tools transform both your process and your results. In this guide, we’ll explore the essentials every sewist should own, from everyday sewing tools to specialty leather sets, plus easy step-by-step projects like how to sew a roll-up tool bag, tool belt, and tool roll. By the end, you’ll know exactly how to choose, use, and organize the instruments that turn good stitching into couture-level craftsmanship.
Essential Sewing Tools for Every Project
What Are Sewing Tools?
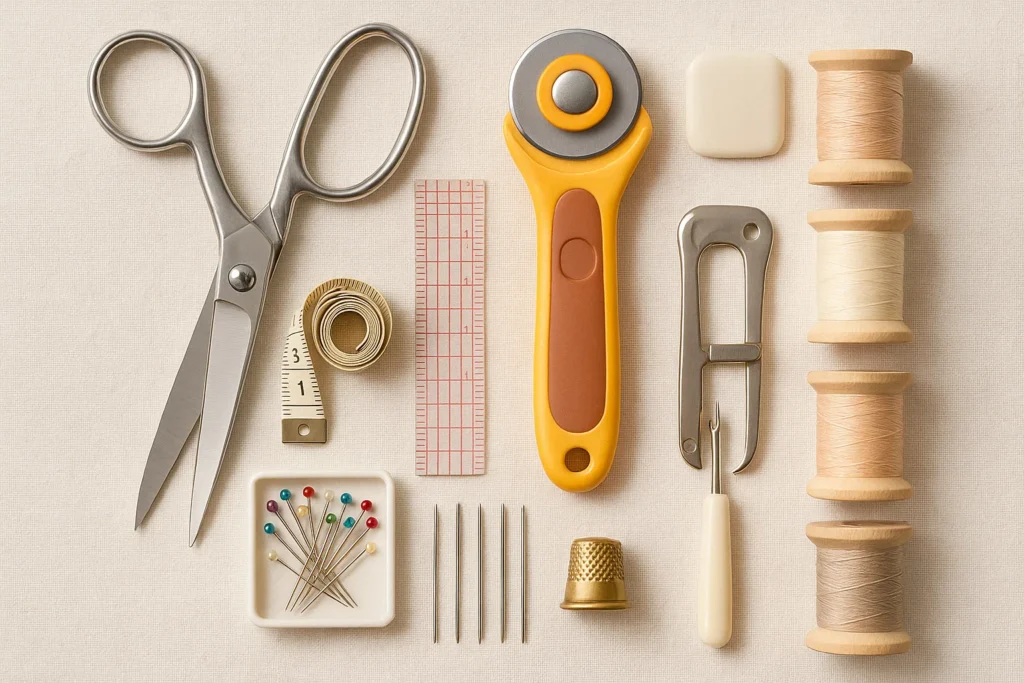
Every stitch begins with the right foundation. Sewing tools are the essentials that bring structure, precision, and beauty to your work. They include cutting instruments such as shears and rotary cutters, measuring tools like rulers and tape measures, marking pens and chalk for accuracy, and pressing aids that refine seams and shapes. These are not just accessories, they are the backbone of your craft, turning fabric into a finished piece that looks professional and fits perfectly.
The Importance of Sewing Tools in Sewing
The success of any garment depends on the tools behind it. Sharp scissors create clean edges that won’t fray. A dependable seam ripper allows for corrections without damaging delicate material. Quality pins, clips, and needles keep your fabric aligned, ensuring smooth seams and balanced hems. The more refined your tools, the more confident and efficient your work becomes.
How to Choose Quality Over Quantity
When selecting your sewing tools, prioritize precision, durability, and comfort. Professional-grade scissors and ergonomic measuring tools last longer and deliver better results than cheaper alternatives. Budget kits may look tempting, but they often dull quickly or lose alignment. At Precision Alterations, we recommend building your toolkit over time start with the basics, then invest in craftsmanship that elevates every project you touch.
Leather Sewing Tools - Specialty Tools
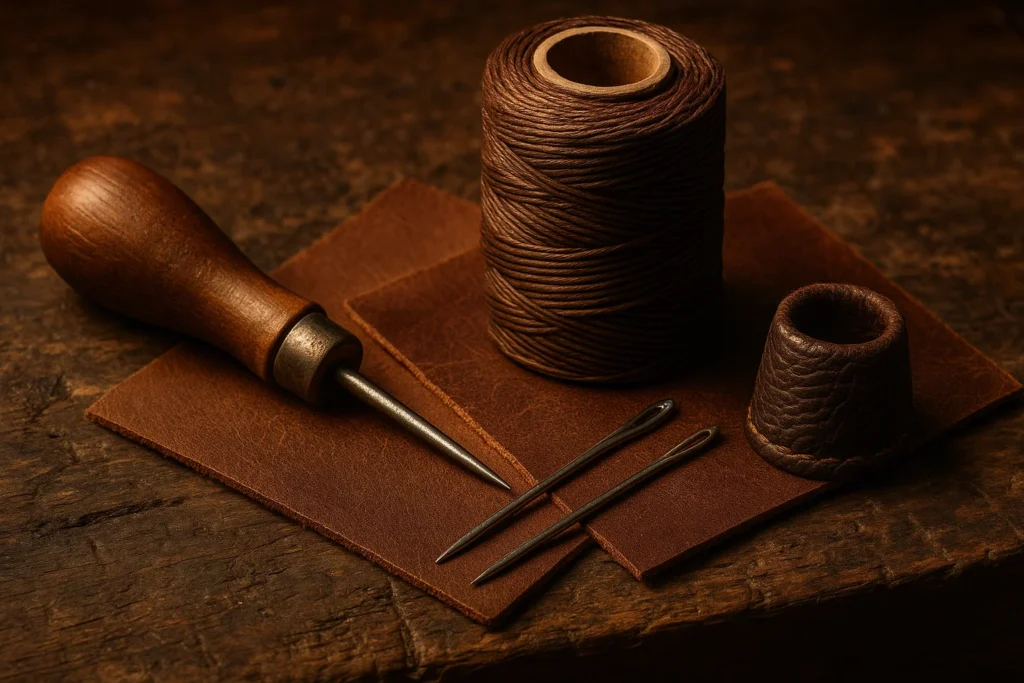
Built for strength: Working with leather requires tools that can handle thicker, tougher materials. Leather sewing tools include heavy-duty needles, waxed threads, and industrial machines that deliver clean, even stitches through dense layers.
Essential equipment: Awls for creating guide holes, durable thimbles for hand stitching, and reinforced presser feet help maintain accuracy and prevent breakage.
Versatile materials: Common choices for projects like tool rolls, belts, and structured bags include canvas, denim, and genuine leather, each offering durability and a refined finish.
Safety first: Always work slowly, secure your material, and use protective gloves when guiding heavy fabric under the needle.
Precision Alterations tip: Our team uses these same professional-grade tools to ensure every leather seam is smooth, strong, and built to last.
The Sewing Needle Threader Tool - Small But Mighty
The sewing needle threader tool may be small, but it’s one of the most practical items in any sewing kit. Designed to guide thread smoothly through even the tiniest needle eyes, it saves time, reduces eye strain, and keeps your focus on stitching, not struggling.
For beginners, it eliminates frustration; for experienced sewists, it speeds up workflow during detailed projects. To use a sewing needle threading tool, insert the wire loop through the needle’s eye, place your thread through the loop, then gently pull it back through. It’s that simple.
Why Make Your Own Tool Organizers
Owning quality sewing tools is only half the equation. Keeping them organized helps maintain efficiency, protect your materials, and create a smoother workflow. Designing your own organizer gives you complete control over layout and size, ensuring every tool fits exactly where you need it.
It also allows for creativity and personalization while saving money compared to store-bought options. A well-made tool organizer keeps your workspace clean and your focus exactly where it belongs, on your craft.
DIY Project 1 - How to Sew a Tool Roll / Roll-Up Tool Bag
Step 1: Choose the right materials
Select strong, flexible fabric such as canvas, denim, or leather. These materials hold shape well and protect your sewing tools from wear and tear.
Step 2: Measure and cut the fabric
Cut two rectangles of equal size, one for the outer layer and one for the lining. Adjust dimensions based on the number and size of tools you plan to store.
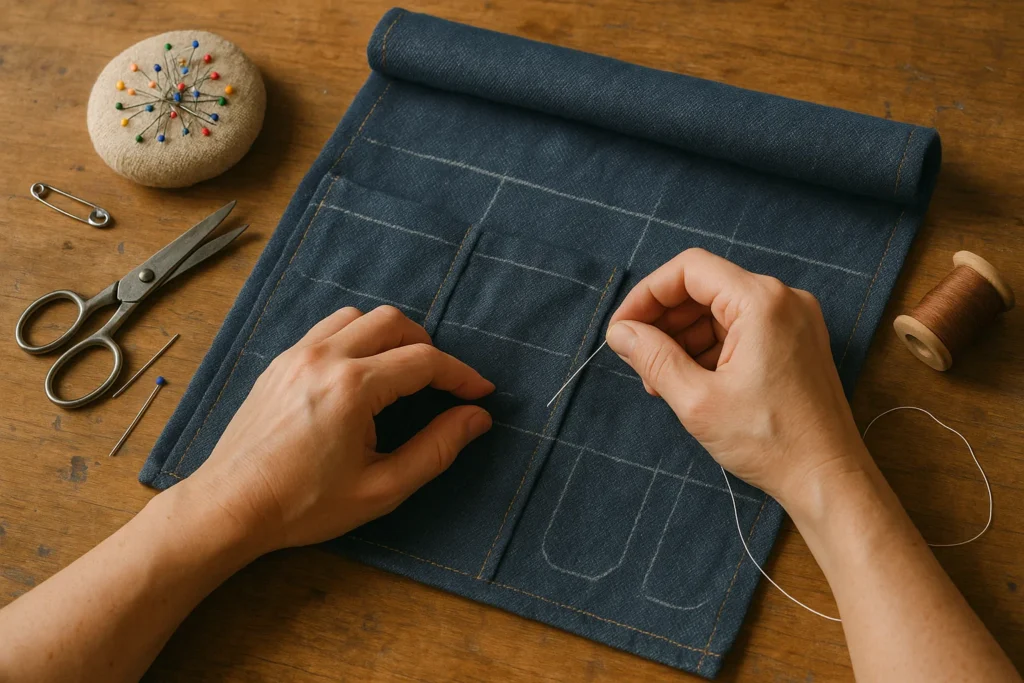
Step 3: Create the pockets
Use tailor’s chalk to mark where each pocket will go. Stitch along the lines to form compartments that fit each tool securely.
Step 4: Assemble the roll
Place the two fabric layers right sides together and sew around the edges, leaving a small gap. Turn it right side out and press flat for a crisp edge.
Step 5: Add closures and custom touches
Attach fabric ties, leather straps, or snap buttons for secure closure. For a more advanced version, include a zipper pouch or handle.
A well-made roll-up tool bag keeps your sewing essentials neatly arranged, easy to transport, and ready for every creative project.
DIY Project 2 - How to Sew a Tool Bag
Step 1: Understand the design
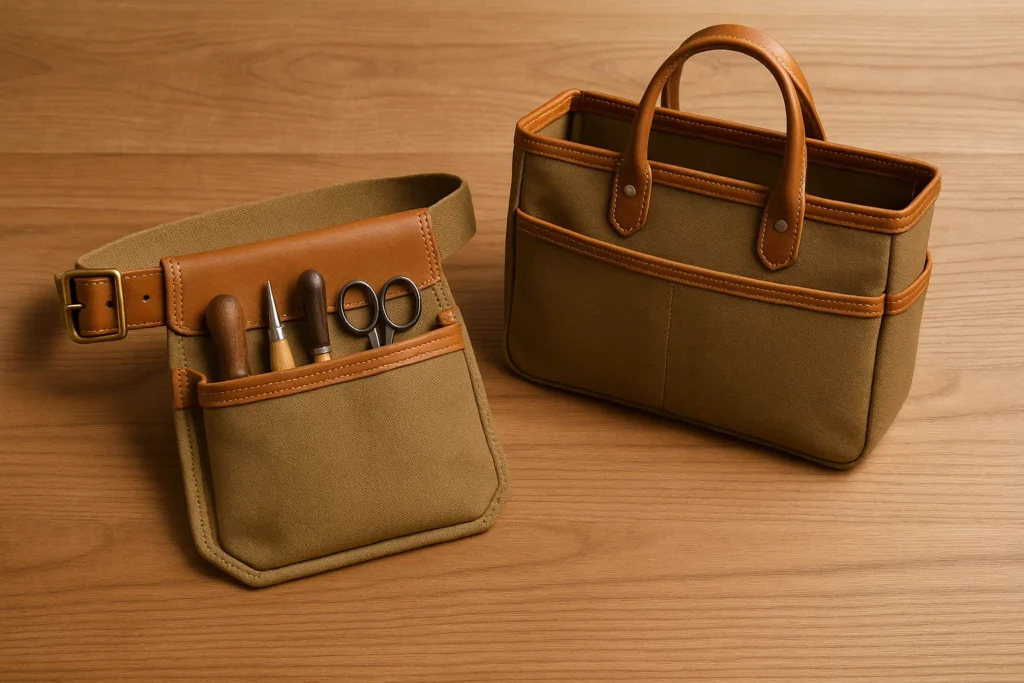
Learning how to sew a tool bag gives you more structure and space than a roll-up version. A tool bag stands upright, holds larger supplies, and often includes a reinforced base for added stability.
Step 2: Gather materials
Choose sturdy fabric such as canvas, denim, or heavy cotton. For extra strength, use leather sewing tools to attach leather corners or handles. You’ll also need matching thread, scissors, pins, and a sewing machine.
Step 3: Construct the bag
Cut panels for the front, back, sides, and bottom. Sew them together carefully, reinforcing seams at stress points like handles and corners. Add inner pockets or dividers to organize smaller tools.
Step 4: Finish with structure
Press the seams flat and topstitch around the edges for a professional look. This tool bag is durable, functional, and designed to last through countless creative projects.
DIY Project 3 - How to Sew a Tool Belt
Step 1: Discover the benefits
Learning how to sew a tool belt is perfect for anyone who wants hands-free convenience while working. A custom-made belt keeps your essential tools close, saving time and effort during sewing, crafting, or alterations.
Step 2: Measure and plan
Start by measuring your waist or hip area where you want the belt to sit. Sketch your pocket layout and decide which tools you’ll carry to determine pocket sizes and placement.
Step 3: Cut and assemble
Use heavy fabric, canvas, or leather for durability. Cut the base strap and pockets, then sew each pocket onto the belt body. Add belt loops or adjustable straps for comfort.
Step 4: Reinforce for strength
Double-stitch stress points and secure edges with topstitching. This ensures your tool belt remains strong and dependable, ready to handle years of creative use.
Tool Care & Sewing Tips
Caring for your sewing tools is essential to maintaining precision and consistency in every stitch. Keep scissors and rotary blades sharp by cleaning them after each use and storing them safely in protective cases. Wipe down metal parts to prevent rust and buildup, and replace dull needles before they damage your fabric. Organize your tools in your handmade roll, bag, or belt for easy access and efficiency.
At Precision Alterations, our professionals follow the same disciplined care routine, ensuring every cut and seam meets the highest standard of craftsmanship. When your tools are maintained properly, your sewing becomes smoother, cleaner, and more rewarding.
Conclusion
Frequently Asked Questions
What are the most essential sewing tools every beginner should have?
Start with sharp scissors, pins, a seam ripper, measuring tape, and needles. These basics ensure accuracy and control in every project.
How often should sewing tools be cleaned or replaced?
Clean tools after each use and replace dull needles regularly. Sharp, well-maintained tools always produce cleaner results.
What fabric works best for tool rolls and bags?
Canvas, denim, or leather work best for durability and structure. They protect tools and last through years of use.
How can Precision Alterations help with professional sewing and fitting needs?
Precision Alterations provides expert tailoring and custom fittings for men and women, delivering a flawless, timeless fit for every occasion.
For those looking to complete their look with an affordable, high-quality suit, visit our partner company Van Allan’s Men’s Fashion, proudly serving Phoenix with timeless style and exceptional craftsmanship.
SUBSCRIPTION
Subscribe to our newsletter
Store Hours Phoenix
Monday – Friday
10:00am – 06:00pm
Saturday
10:00am – 04:00pm
Sunday
Off
Tucson Store Hours
Monday – Saturday
09:00am – 07:00pm
Sunday
11:00am – 05:00pm
Contact Us
- +602 2750599
- precisionalterations@yahoo.com
- Arcadia Crossing 4539 E. Thomas Road, Suite 104, Phoenix, AZ 85018